The FPV market had been missing in dependable but reasonably priced frames. Historically, the TBS Supply One was the one good funds possibility, however the sport is altering. Enter Speedybee’s Mario 5 Body, a contender that caught my eye not only for its budget-friendly worth of $33.99 however for its suite of promising options and upgradable choices. Let’s dive into what makes the Mario 5 stand out, together with its construct high quality and general efficiency.

The place to Purchase?
You may get the Speedybee Mario 5 from these distributors:
The Mario 5 Body is available in two distinct types: the Useless Cat (DC) for cinematic fans eager on protecting propellers out of shot, and the Basic True-X (XH) for freestyle flyers and racers craving symmetry and steadiness. Curious concerning the totally different body configurations? I discovered an important useful resource right here: https://oscarliang.com/fpv-drone-frames/#Configuration

Specs
| Mario 5 DC Wheelbase | 227mm |
| Mario 5 DC Weight | 129 ±5g (3D Printed Components Excluded) |
| 170 ±5g (3D Printed Components and Injection) | |
| Mario 5 XH Wheelbase | 226mm |
| Mario 5 XH Weight | 126 ±5g (3D Printed Components Excluded) |
| 167±5g (3D Printed Components and Injection) | |
| High Plate Thickness | 2.5mm (T300 3K) |
| Center Plate Thickness | 2.0mm (T300 3K) |
| Backside Plate Thickness | 2.5mm (T300 3K) |
| Arm Thickness | 6mm (T300 3K) |
| Digicam Mounting Screw | 7mm |
| 3D Printed Components | Yellow TPU |
| Battery Anti-Slip Pad | Silicone 3mm |
| Motor Spring Gap Place | Φ8mm |
| Suitable Propeller Dimension | Max 5.1 Inch |
| Motor Mounting Gap Distance | 16-19mm |
| FC Mounting Gap | 30.5×30.5 (M3) |
| VTX Mounting Gap | 20×20 (M2) / 25.5×25.5 (M2) |
| Head Materials | Aviation Aluminum Alloy |
| Aluminum Column Materials | 7075 D5*23mm/D46*22mm |
| Inner Mounting Peak | 23-31mm |
| Receiver Set up House | 25*13*6mm |
| Appropriate Capacitor Dimension | Φ10mm*20mm |
| GPS Set up Dimension | 18*18*7mm |
Completely different Variations
What genuinely units the Mario 5 aside is its choices and scalability relies on your funds and necessities. There are 3 variations: Mario Lite, Mario Advance, and Mario Professional.

Beginning with the Mario Lite – the bottom mannequin at $33.99, you may enter the sport affordably and decide to improve as you go. It provides the naked minimal of components, however barely greater than what you’ll usually get with the TBS SourceOne. The carbon fibre components have a lot nicer end too.
The Advance model provides aesthetic and useful enhancements, whereas the Professional model (although not but obtainable) guarantees much more. For these with no 3D printer, the Advance model is a no brainer, providing vital worth for a small further price of $6.
Personally I prioritize worth and efficiency over the way it appears, so I will probably be constructing the Professional model, perhaps excluding some pointless components to avoid wasting weight.

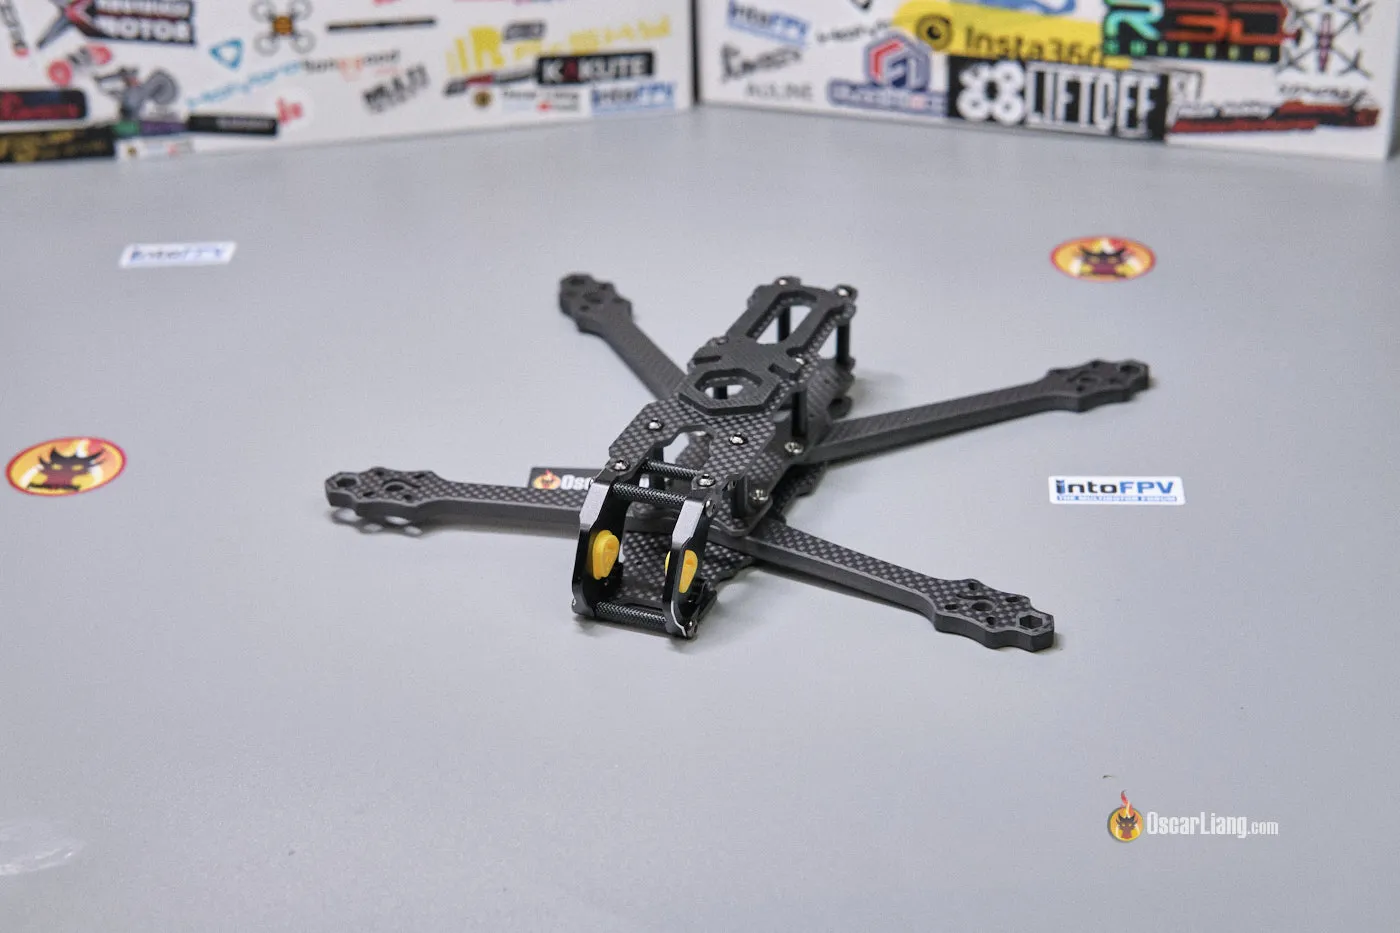
Construct High quality and Design
At first look, the Mario 5 body impresses with its strong design and construct high quality, all for an interesting $34 price ticket.
This body features a prime plate, backside plate, and a mid-plate, alongside particular entrance and rear arms, complemented by quite a lot of equipment like molded plastic components, silicone mounts for the digital camera, aluminum standoffs, and an assortment of screws.

The carbon fiber plates are 2mm-2.5mm thick, whereas the arms boast a thickness of 6mm.
A notably intelligent characteristic is the 10x20mm bay for capacitor placement, a design alternative that effectively avoids muddle. That is one thing I’ve by no means seen earlier than and is probably going a primary in FPV drone frames.

The Professional model is provided with metallic “gills” for the claimed “enhanced airflow”, which additionally provides a cool aesthetic contact. Nonetheless, I plan to not set up these in favor of saving weight, as I discover them pointless for my construct.
The mounting choices for the XT60 connector have been thoughtfully designed, permitting for placement on the entrance or again of the body. The inclusion of a metallic bushing for VTX antenna set up is a welcome addition, providing an additional layer of safety.

Furthermore, the body helps each 19mm and 20mm FPV cameras, together with any micro FPV cameras in addition to the DJI O3, due to the included silicone dampers. This ensures compatibility with a variety of digital camera choices, marking a bonus over the Supply One, which lacks native help for the O3 digital camera with out custom-made 3D printed components.

The rear of the body is designed to accommodate a video transmitter, offering sufficient area even for the cumbersome DJI O3 Air Unit.

The Meeting Expertise
Due to the handbook supplied on the Speedybee web site, assembling this body is a comparatively simple activity for an skilled drone builder like myself. Nonetheless, newcomers would possibly discover the handbook missing in detailed, step-by-step directions.
But, placing collectively the Mario 5 turned out to be extra complicated than anticipated. The body’s distinctive design, such because the interlocking arms and vertical carbon fiber items supposed for capacitor housing, felt a bit overengineered and maybe barely pointless.

It’s unclear whether or not the problem was because of the tight tolerances or if the carbon fiber components had been inaccurately lower, however I discovered it just about inconceivable to put in the small vertical items and the arms on the identical time. I spent over 40 minutes trying this to no avail, which was fairly irritating. Ultimately, I made a decision not putting in these small vertical items altogether. Regardless of this, the arms remained stiff. Whereas the tight match from the design’s exact tolerances undoubtedly contributes to the body’s general stiffness—enhancing its structural integrity—it may additionally complicate the method of changing arms afterward, probably requiring disassembly of the body’s backside and mid plates.
Last Ideas
As talked about earlier, one vital problem I encountered with the Speedybee Mario 5 body was its meeting complexity. Whereas this complexity showcases SpeedyBee’s dedication to element, it might be perceived as overkill by pilots who worth simplicity. Moreover, the tolerances are barely too tight, complicating the meeting course of additional.
One other level to contemplate is the dearth of native help for 20x20mm stacks. Nonetheless, this difficulty might be readily addressed with the usage of an adapter.
Regardless of these hurdles, the Mario 5’s worth level is remarkably aggressive, providing an economical possibility with out compromising on high quality. The body’s potential for personalisation and its sturdy design in the end stand out. With the capability to improve from the Mario Mild model to the Mario Advance or Mario Professional, the body supplies each flexibility and scalability.
You may get the Speedybee Mario 5 from these distributors:
Let’s hope Speedybee will start providing spare components within the close to future. At present, I can’t discover spare arms and plates on their web site. This addition would drastically improve the body’s enchantment and longevity within the aggressive FPV market.