The DJI Air 3 is a flexible drone that caters to everybody: these new to flying drones, fans, content material creators, and professionals.
What makes the Air 3 such a well-rounded drone is its 12 MP and 48 MP photographs, twin cameras, and high-resolution video capabilities.
For many who want various sizes of storage to accommodate larger-sized content material information, or wish to take screenshots or display recordings of their DJI RC 2, the Air 3 can simply accommodate you.
This text and the included YouTube video shall be a step-by-step tutorial strolling via inserting, ejecting, and formatting the micro-SD card, for each the Air 3 drone and the DJ RC 2.
Inserting the Micro-SD Card (Air 3)
As DJI drones progress and enhance over time, they will accommodate larger-capacity SD playing cards.
It appears only in the near past that the 64 GB SD playing cards within the authentic Mavic Professional had been too giant to fill. As media file sizes get bigger and bigger, the Air 3 can retailer photographs and movies on SD playing cards as much as 512 GB.
To insert SD playing cards into the Air 3:
STEP 1: Ensure that the Air 3 is powered off.
Whereas holding the Air 3 in a single hand, open the USB-C and SD card port.
Rigorously insert the SD card into the Air 3’s SD card slot, with the gold pin set pointed up (in direction of you). Don’t push the cardboard in all the best way simply but, as it could actually eject and fly away from you.

STEP 2: Whereas the SD card is within the slot, utilizing your fingernail at a slight angle, push the SD card in till it makes an audible “click on”.

As a result of the SD card slot is spring loaded, for those who don’t press the SD card in with a nail at a slight angle, your finger might slip, inflicting the cardboard to pressure eject and be misplaced.
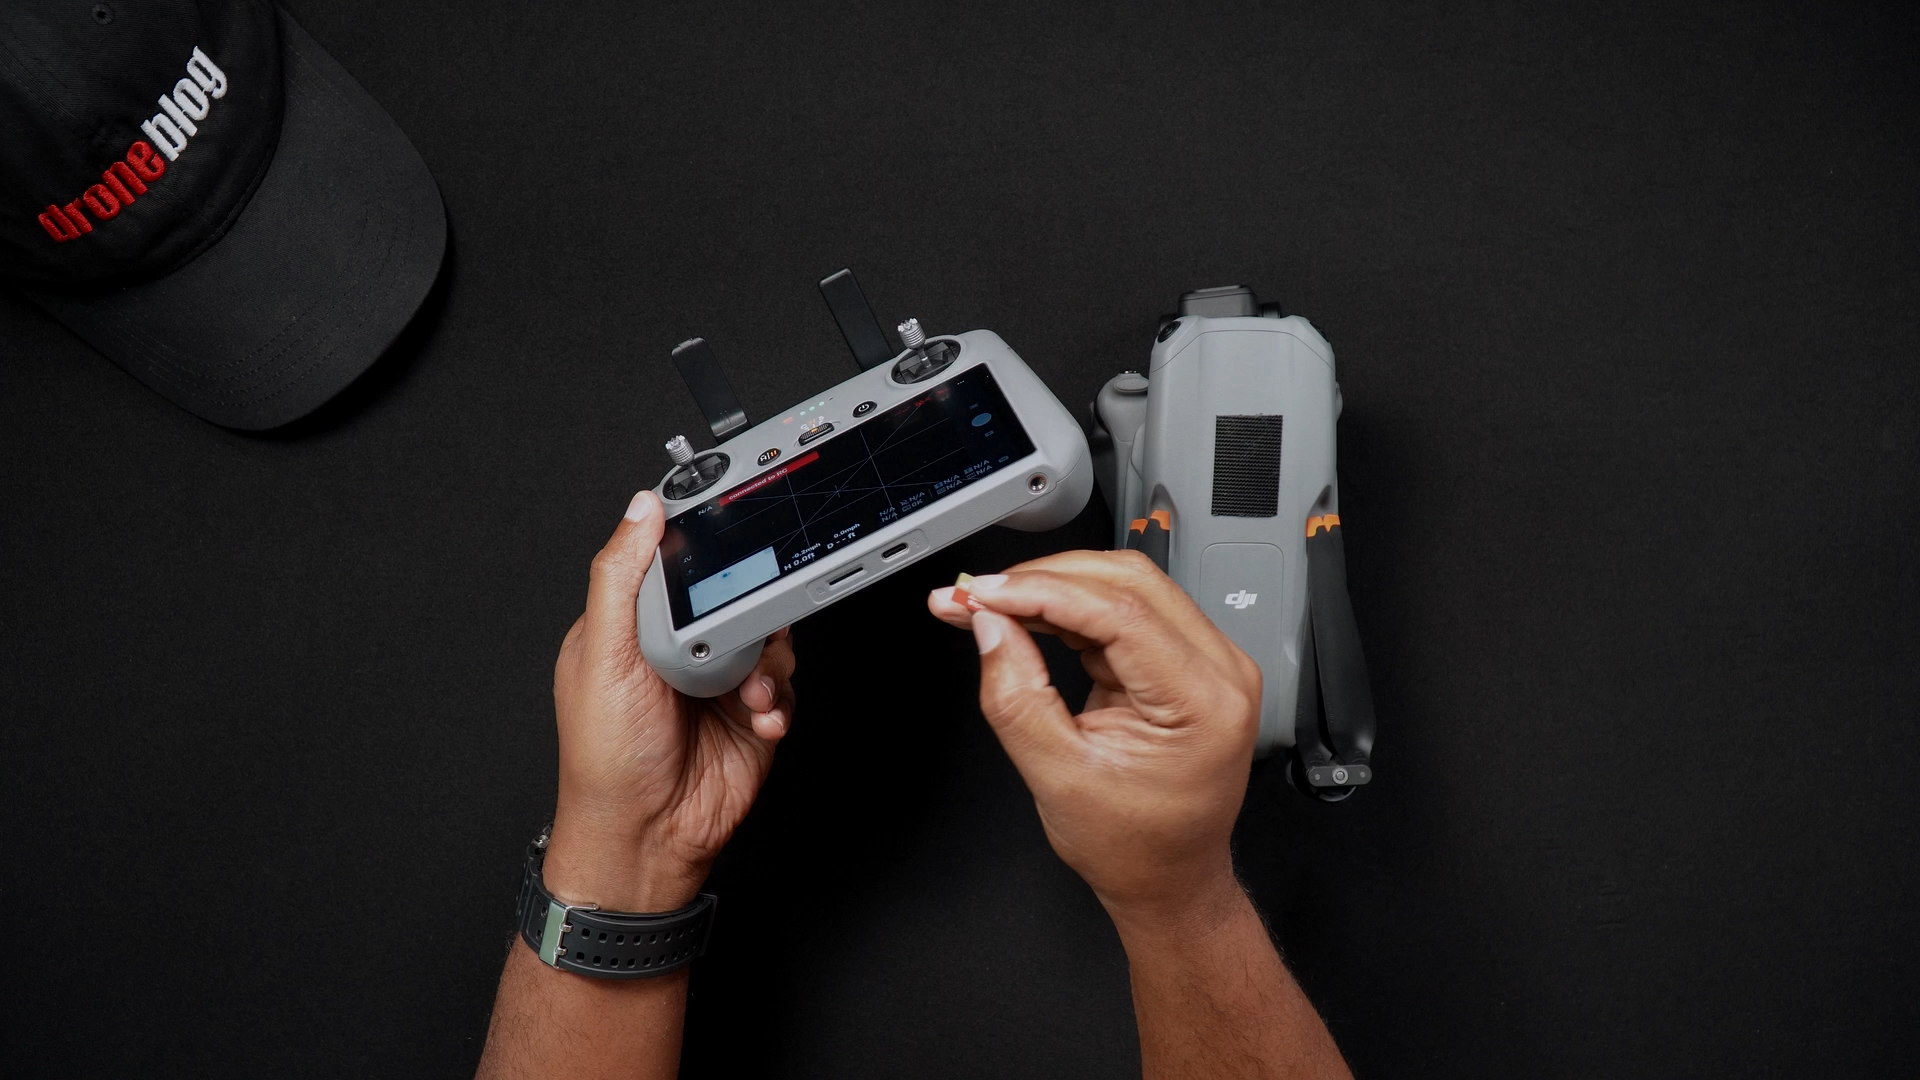
Inserting the Micro-SD Card (DJI RC 2)
In case you personal the combo with the DJI RC 2, you’ll see that there’s additionally an SD card slot within the distant controller as nicely.
The SD card on the DJI RC 2 is at present used for storing screenshots and display recording clips. Time will inform if DJI provides extra gadgets that may be saved to the SD card.
To insert an SD card into the DJI RC 2:
STEP 1: With the DJI RC 2 powered off, partially insert the SD card into the DJI RC 2 SD card slot, this time with the gold pin set pointed down or away from you.
STEP 2: Push the SD card in till it makes an audible “click on”.
Formatting the Micro-SD Card (Air 3)
The method for formatting SD playing cards which can be within the Air 3 is completed inside the DJI Fly app, whether or not you’ve got a DJI RC 2 or the RC-N2 distant controller.
To format the SD card, after powering on each the Air 3 and your present RC:
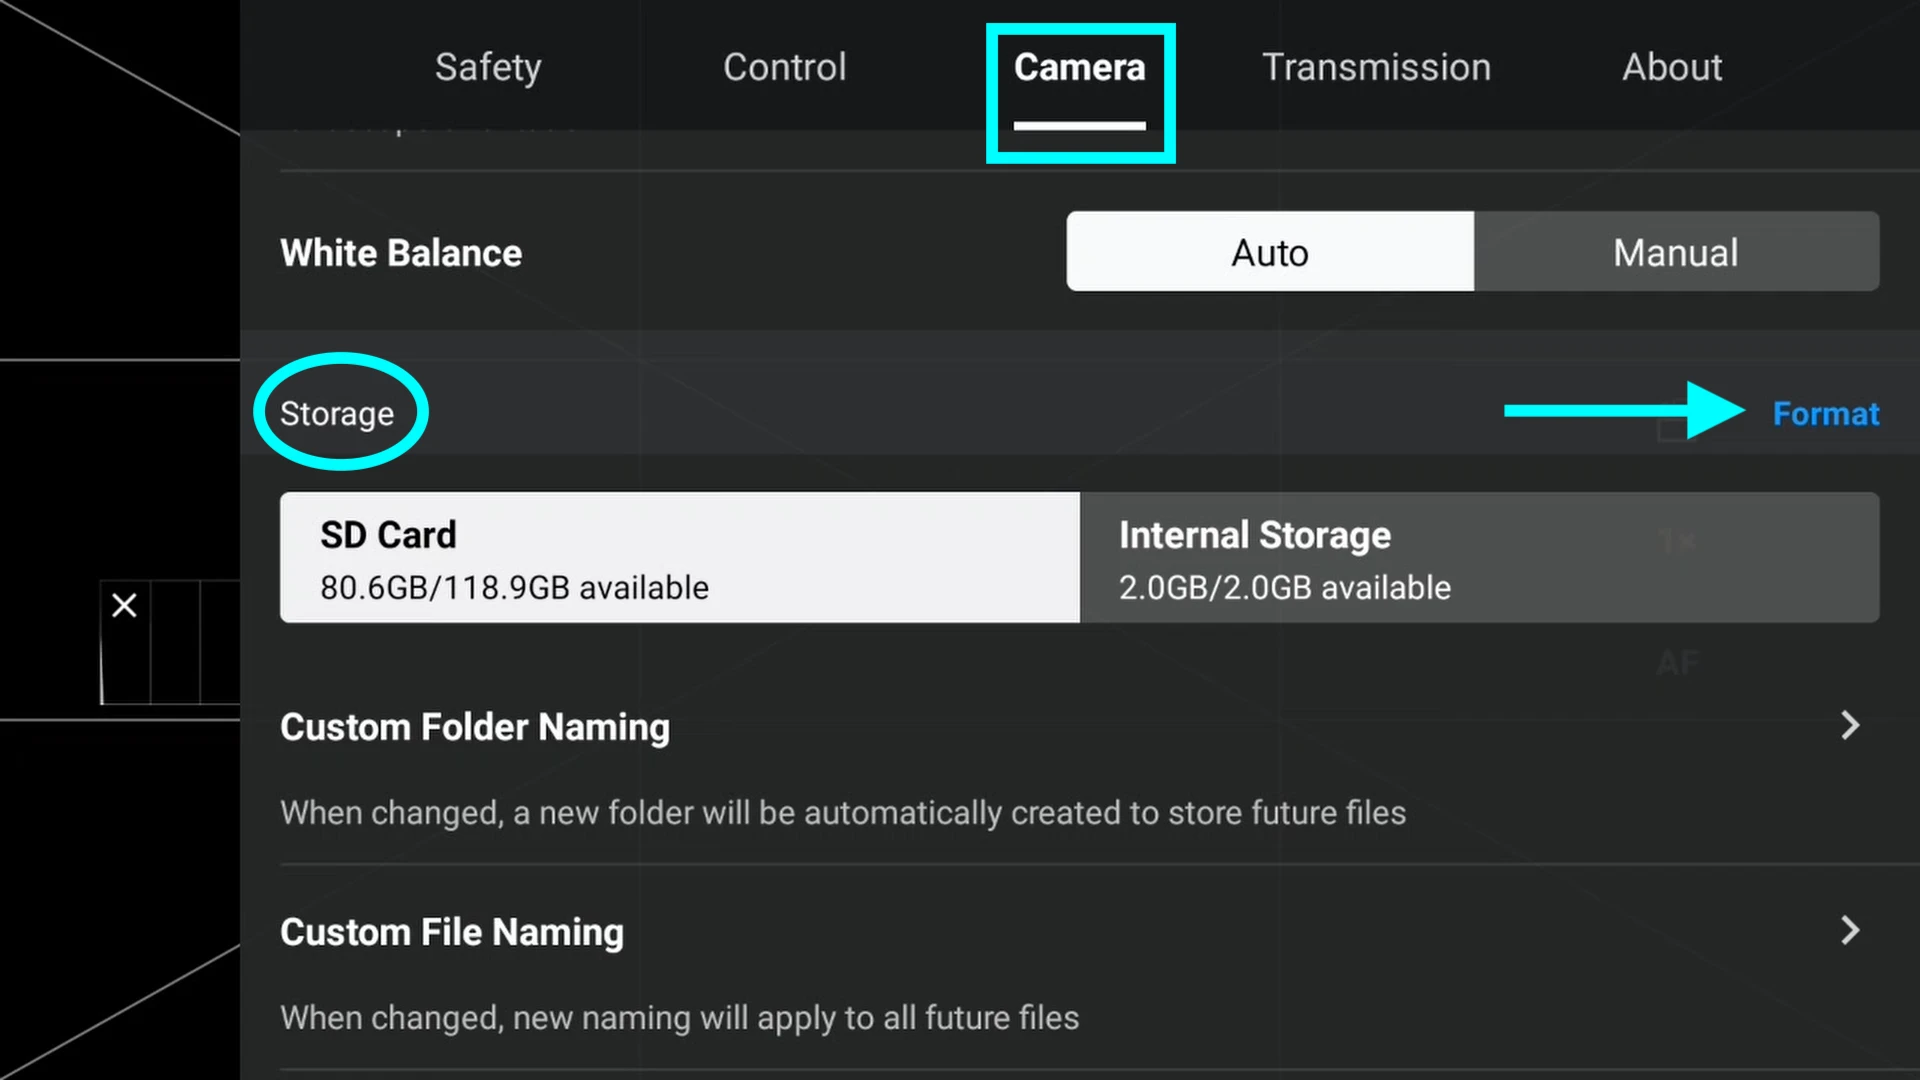
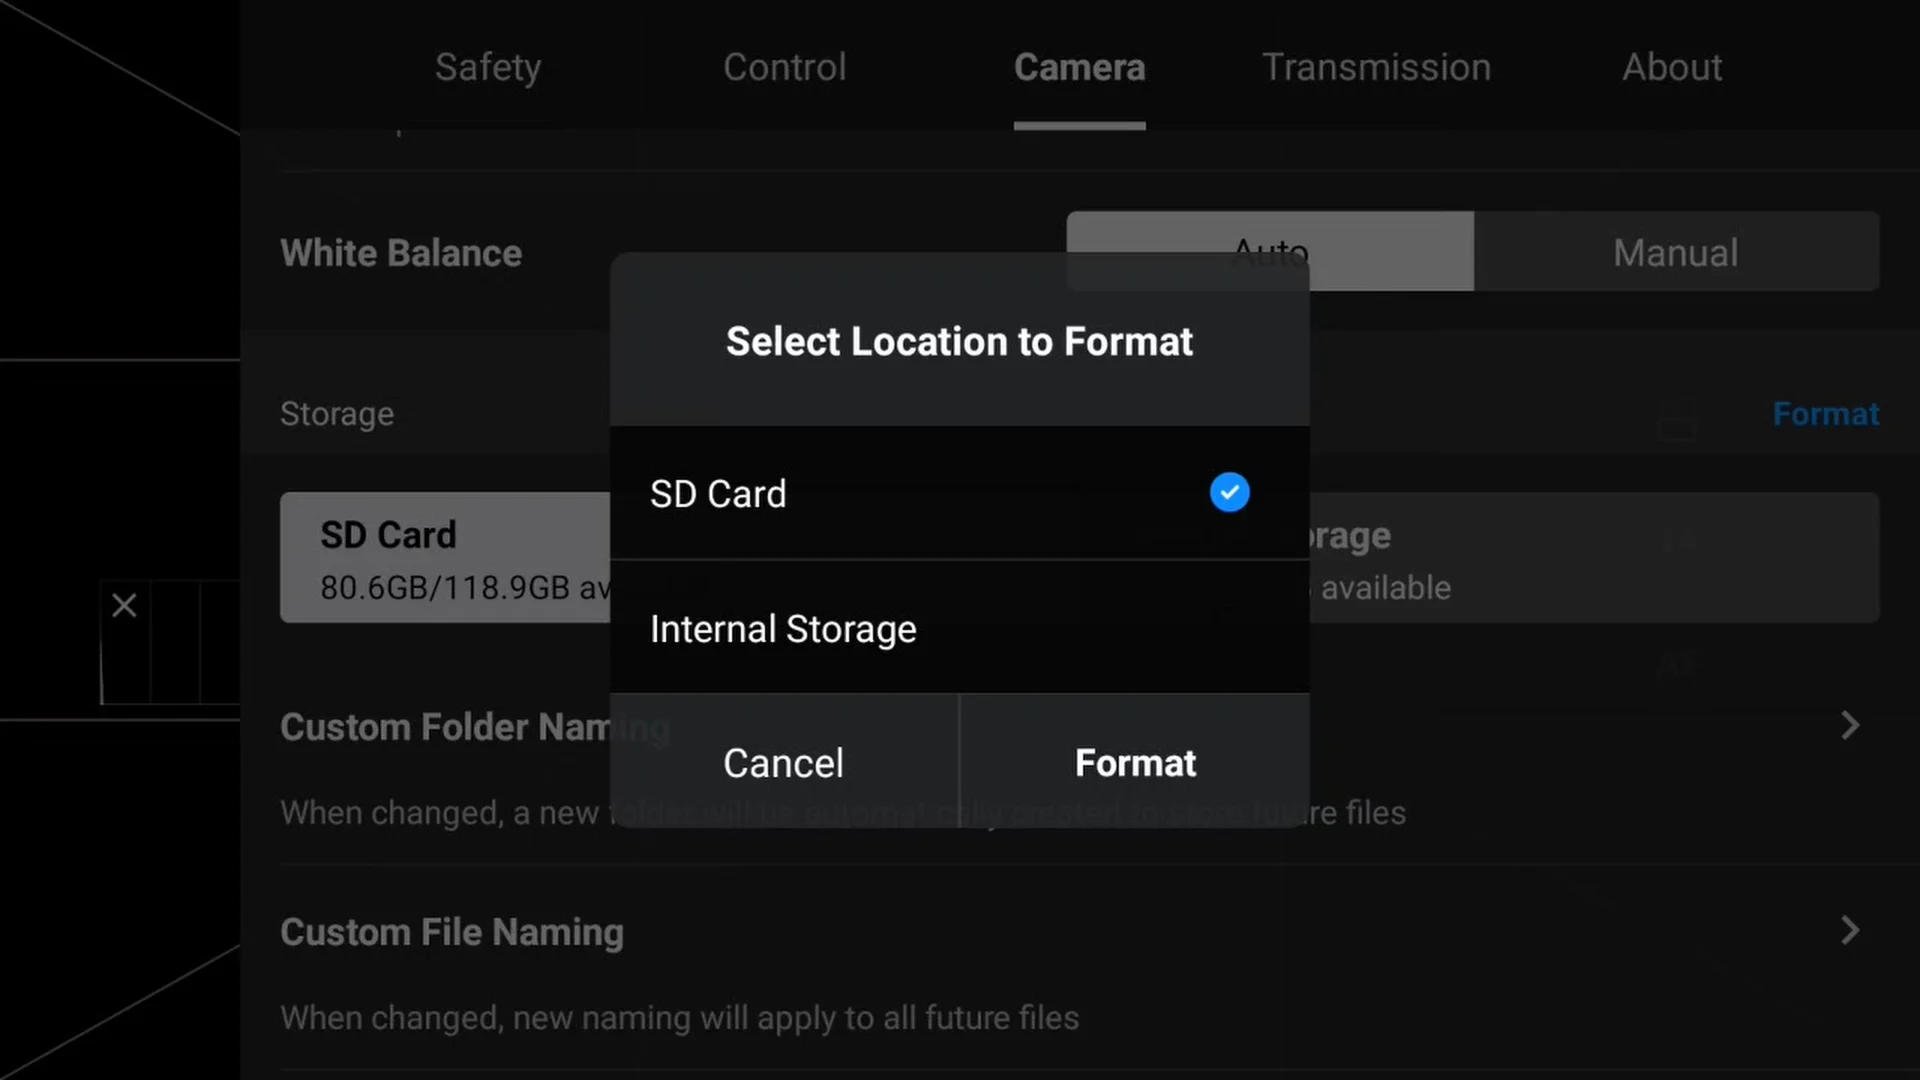
STEP 1: Whereas within the DJI Fly app, go into your settings and find the CAMERA tab.
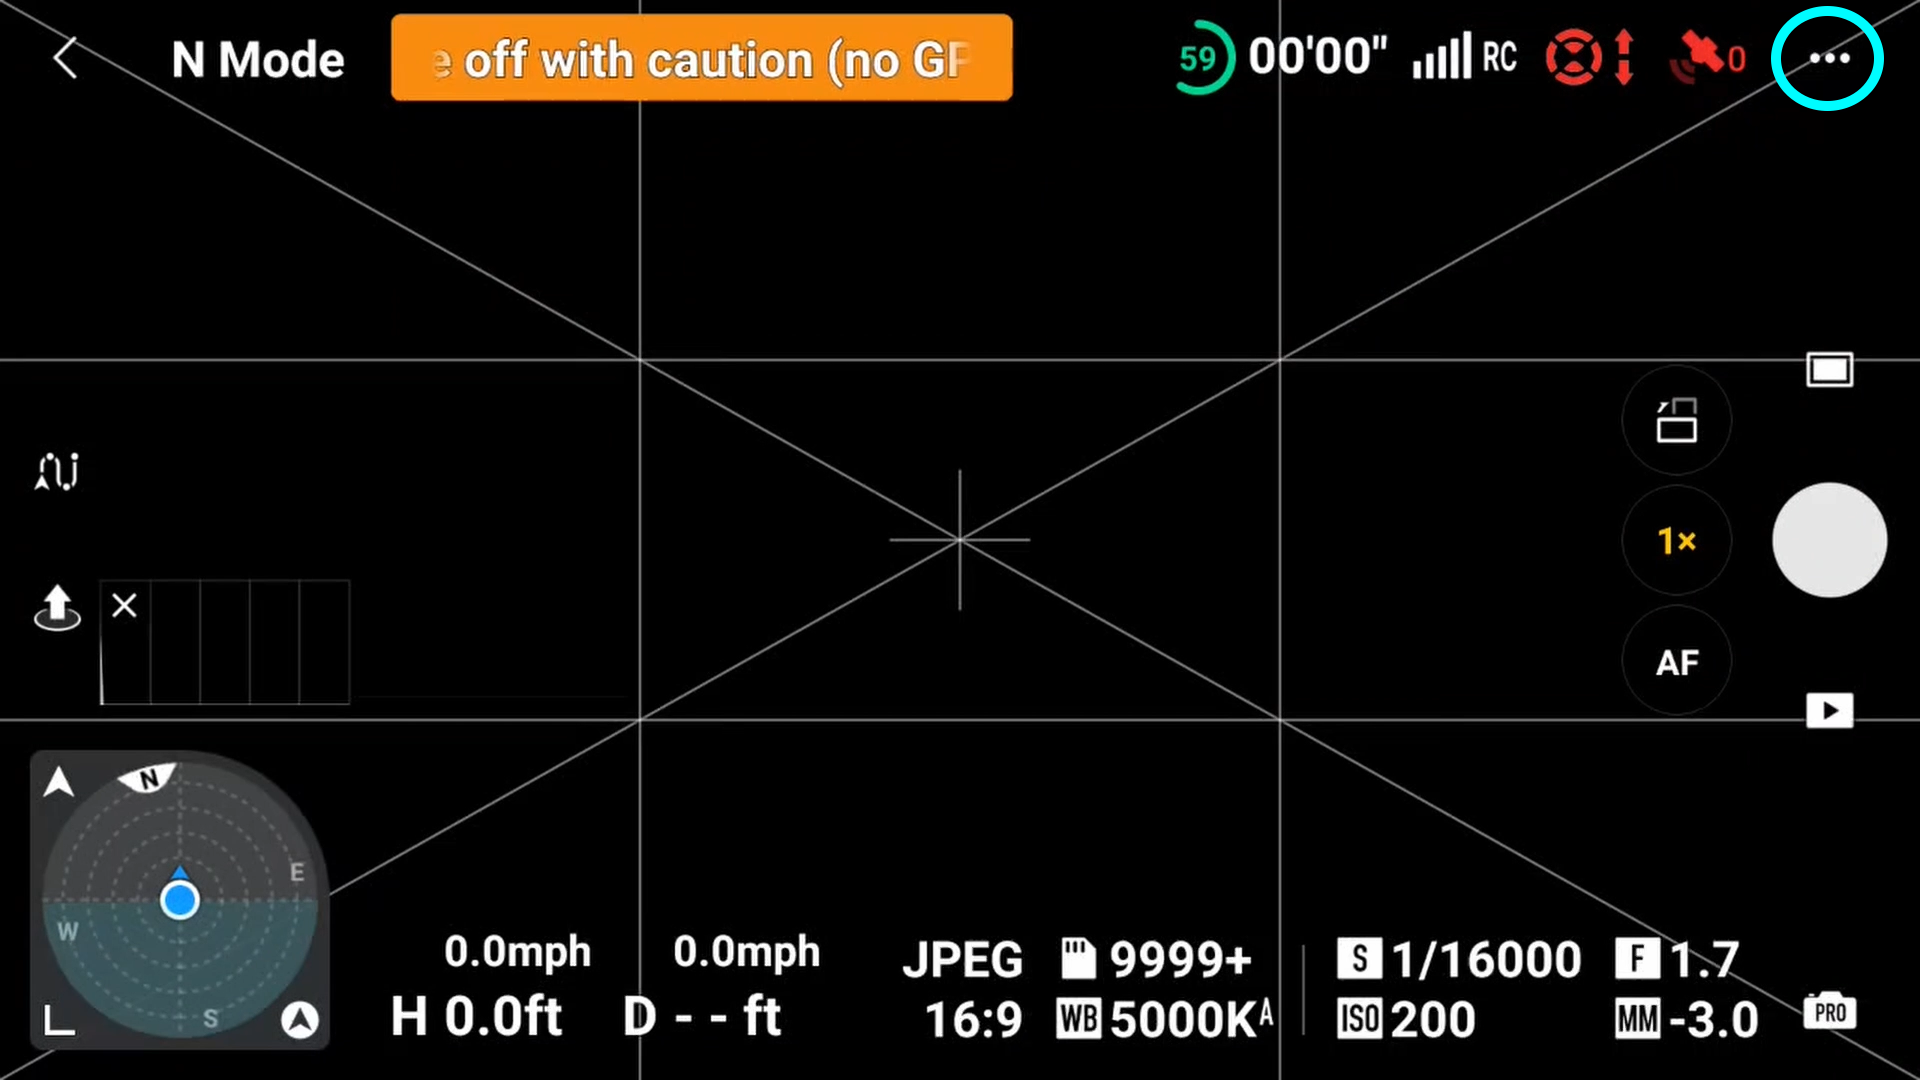


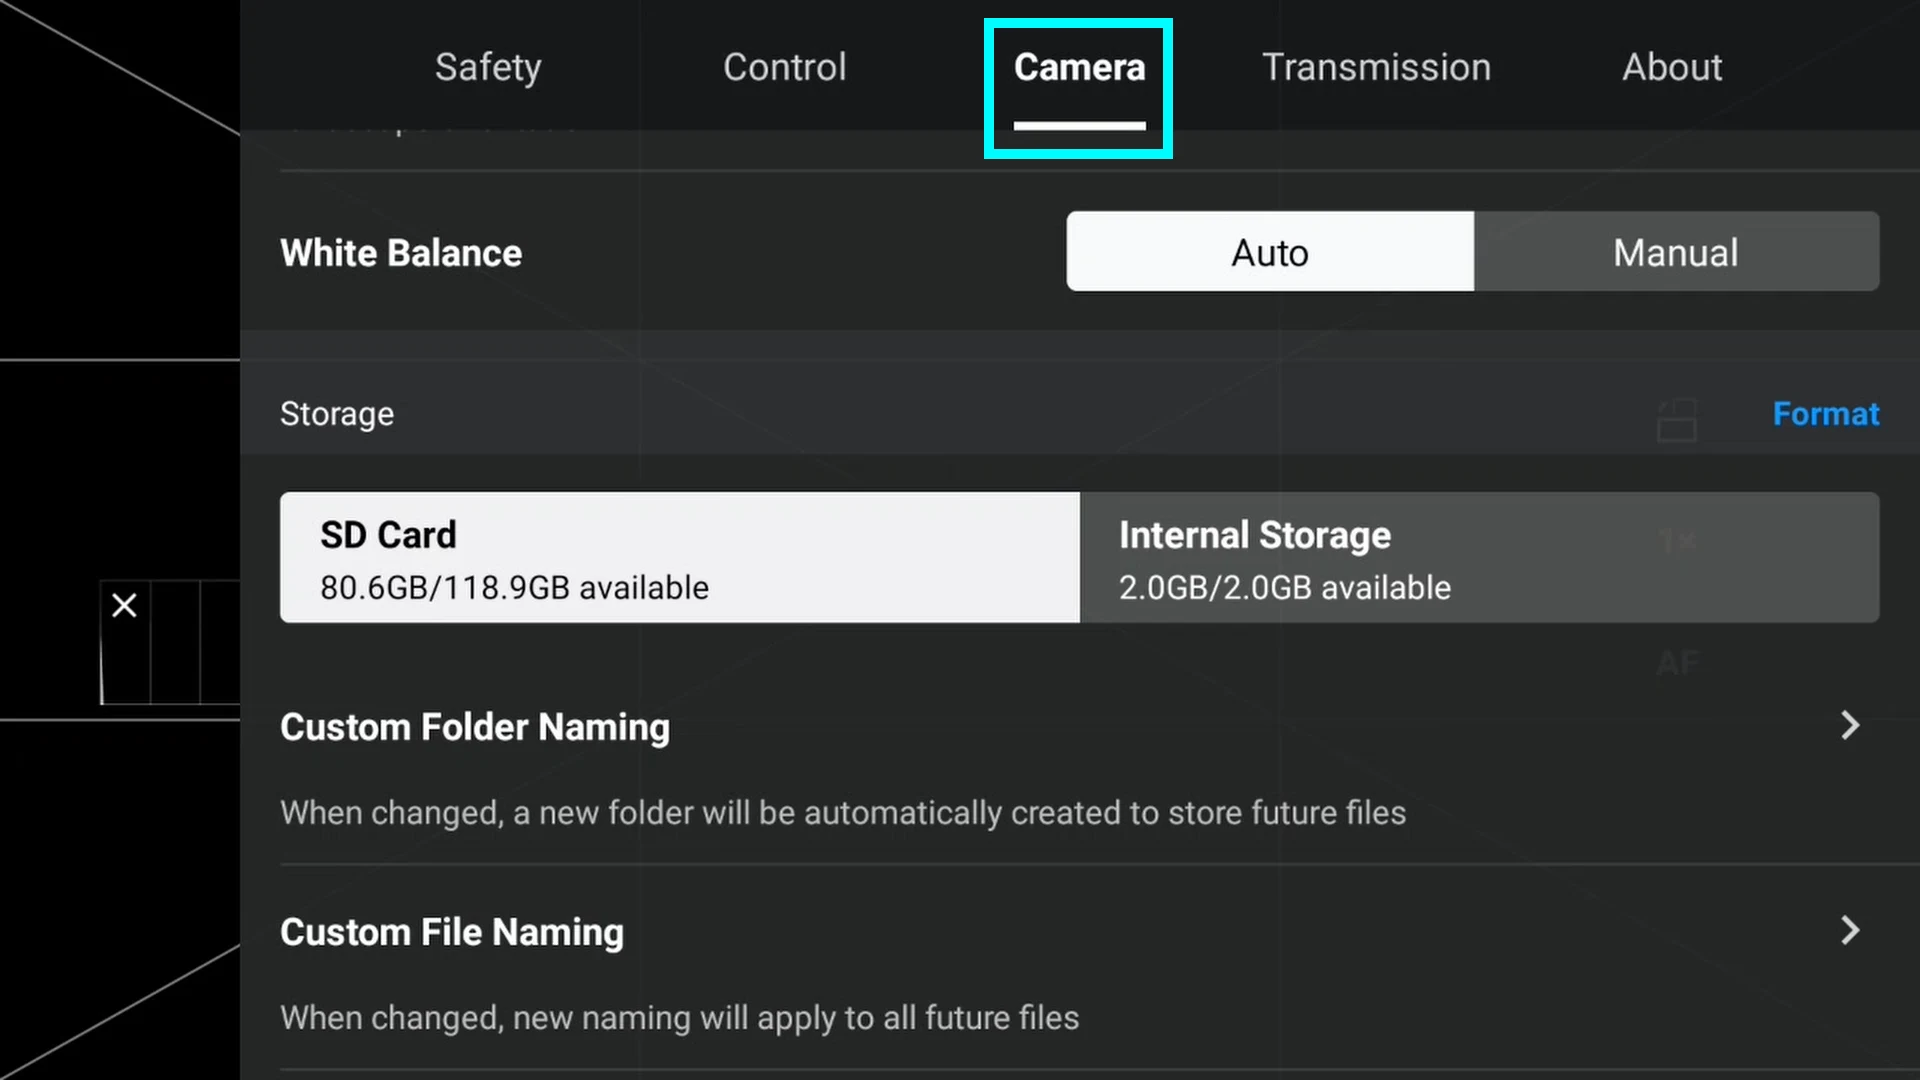
STEP 2: Beneath storage, press format. You can be offered with an choice to format both the SD card or Inner Storage. Select SD card and press Format.


Formatting the Micro-SD Card (DJI RC 2)
In contrast to formatting the SD card within the Air 3, to format the DJI RC 2’s SD card you are able to do so from any display whereas the RC is powered on.
To format the DJI RC 2’s SD card:
STEP 1: Pull down the DJI RC 2’s notification display by double-swiping down.
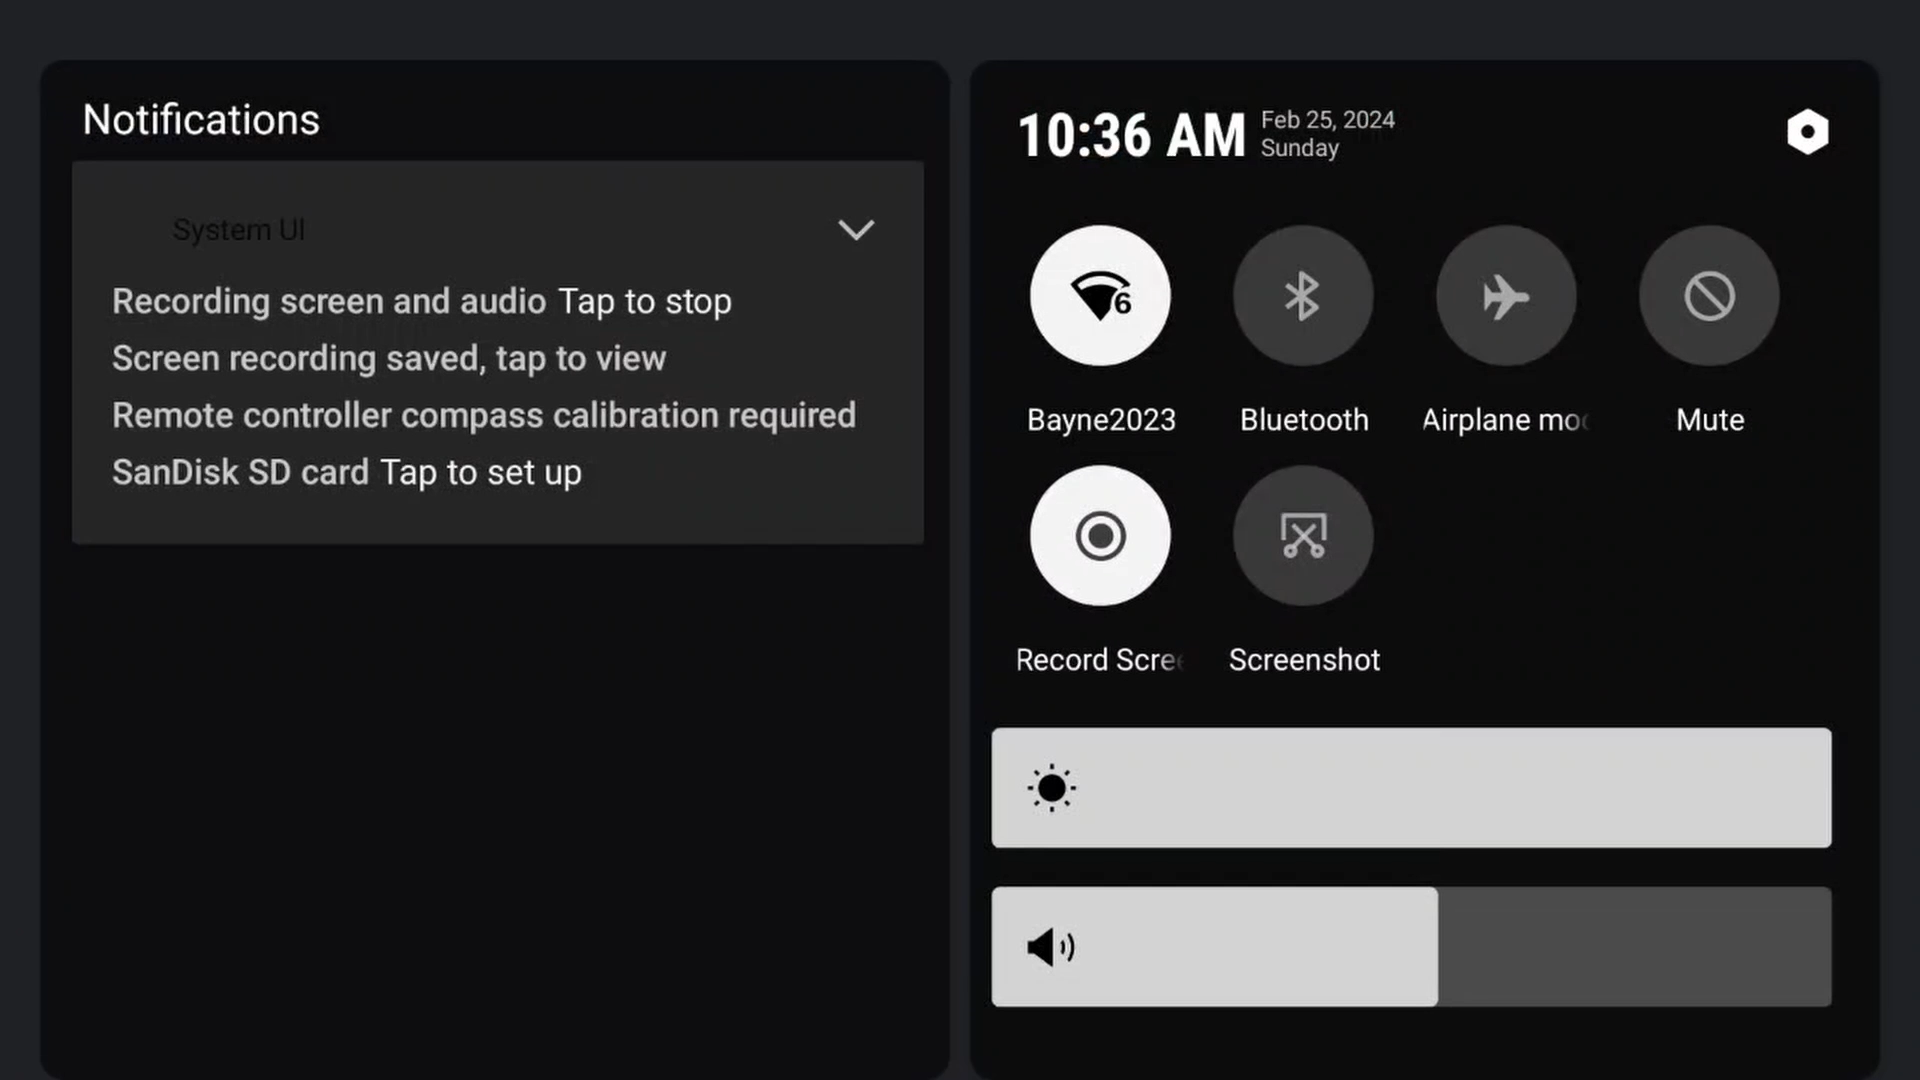
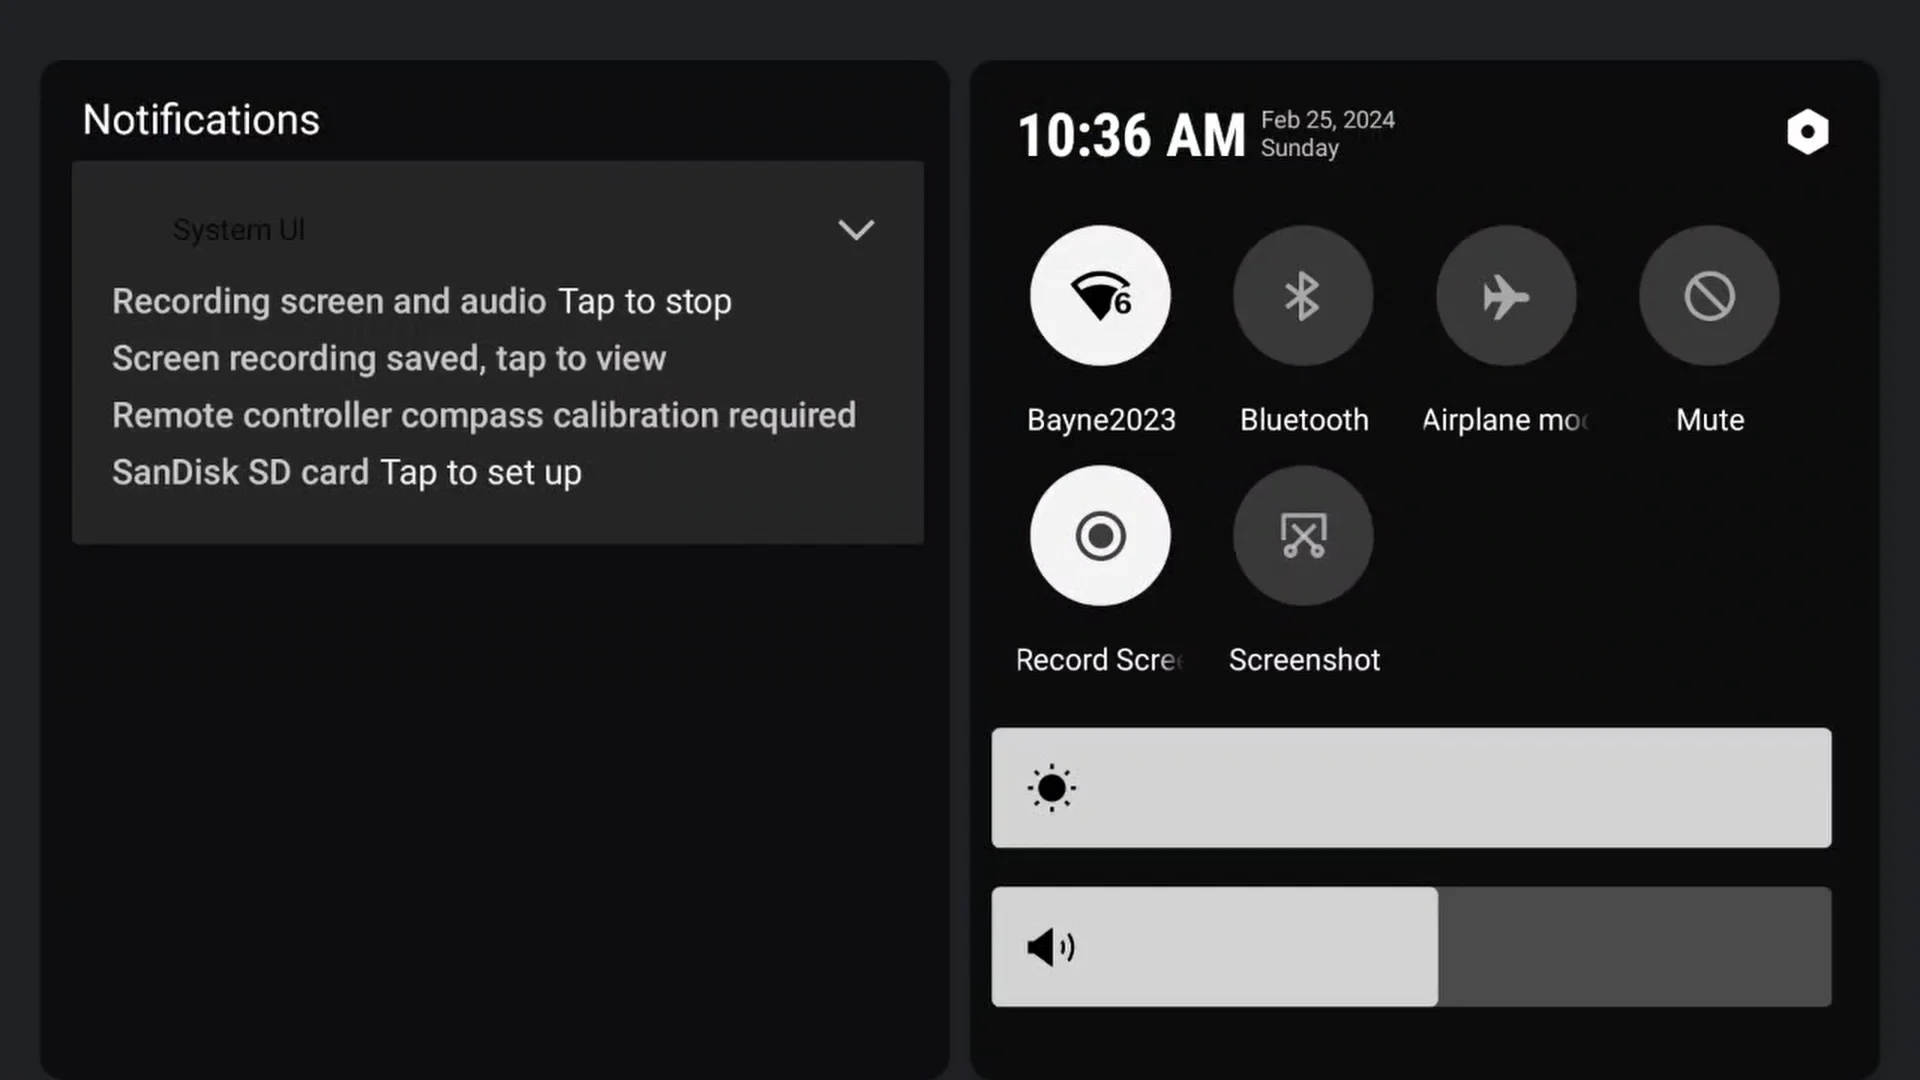
STEP 2: Press the settings/choices gear within the higher right-hand nook of the display.


STEP 3: Faucet STORAGE
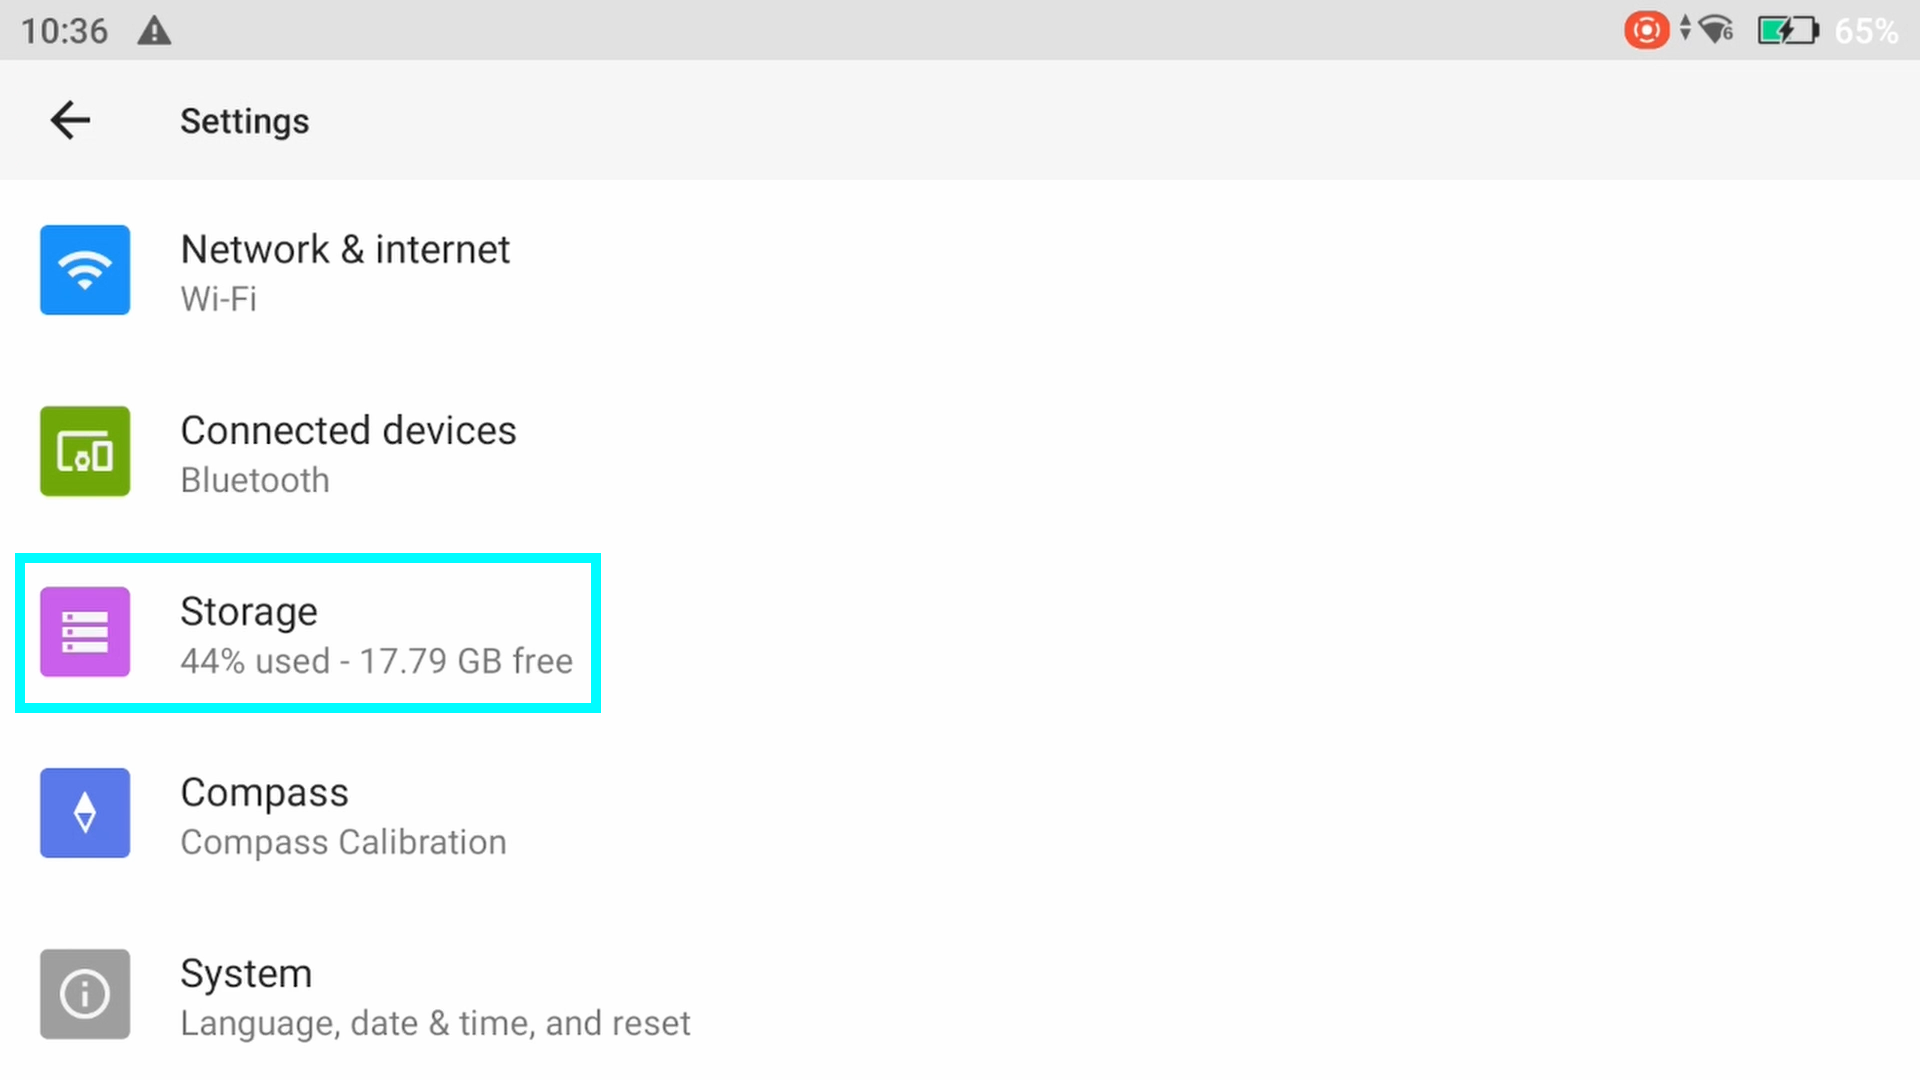

STEP 4: On the underside of the display, underneath Moveable Storage, you will notice your SD card. Mine is labeled DJIRC2.

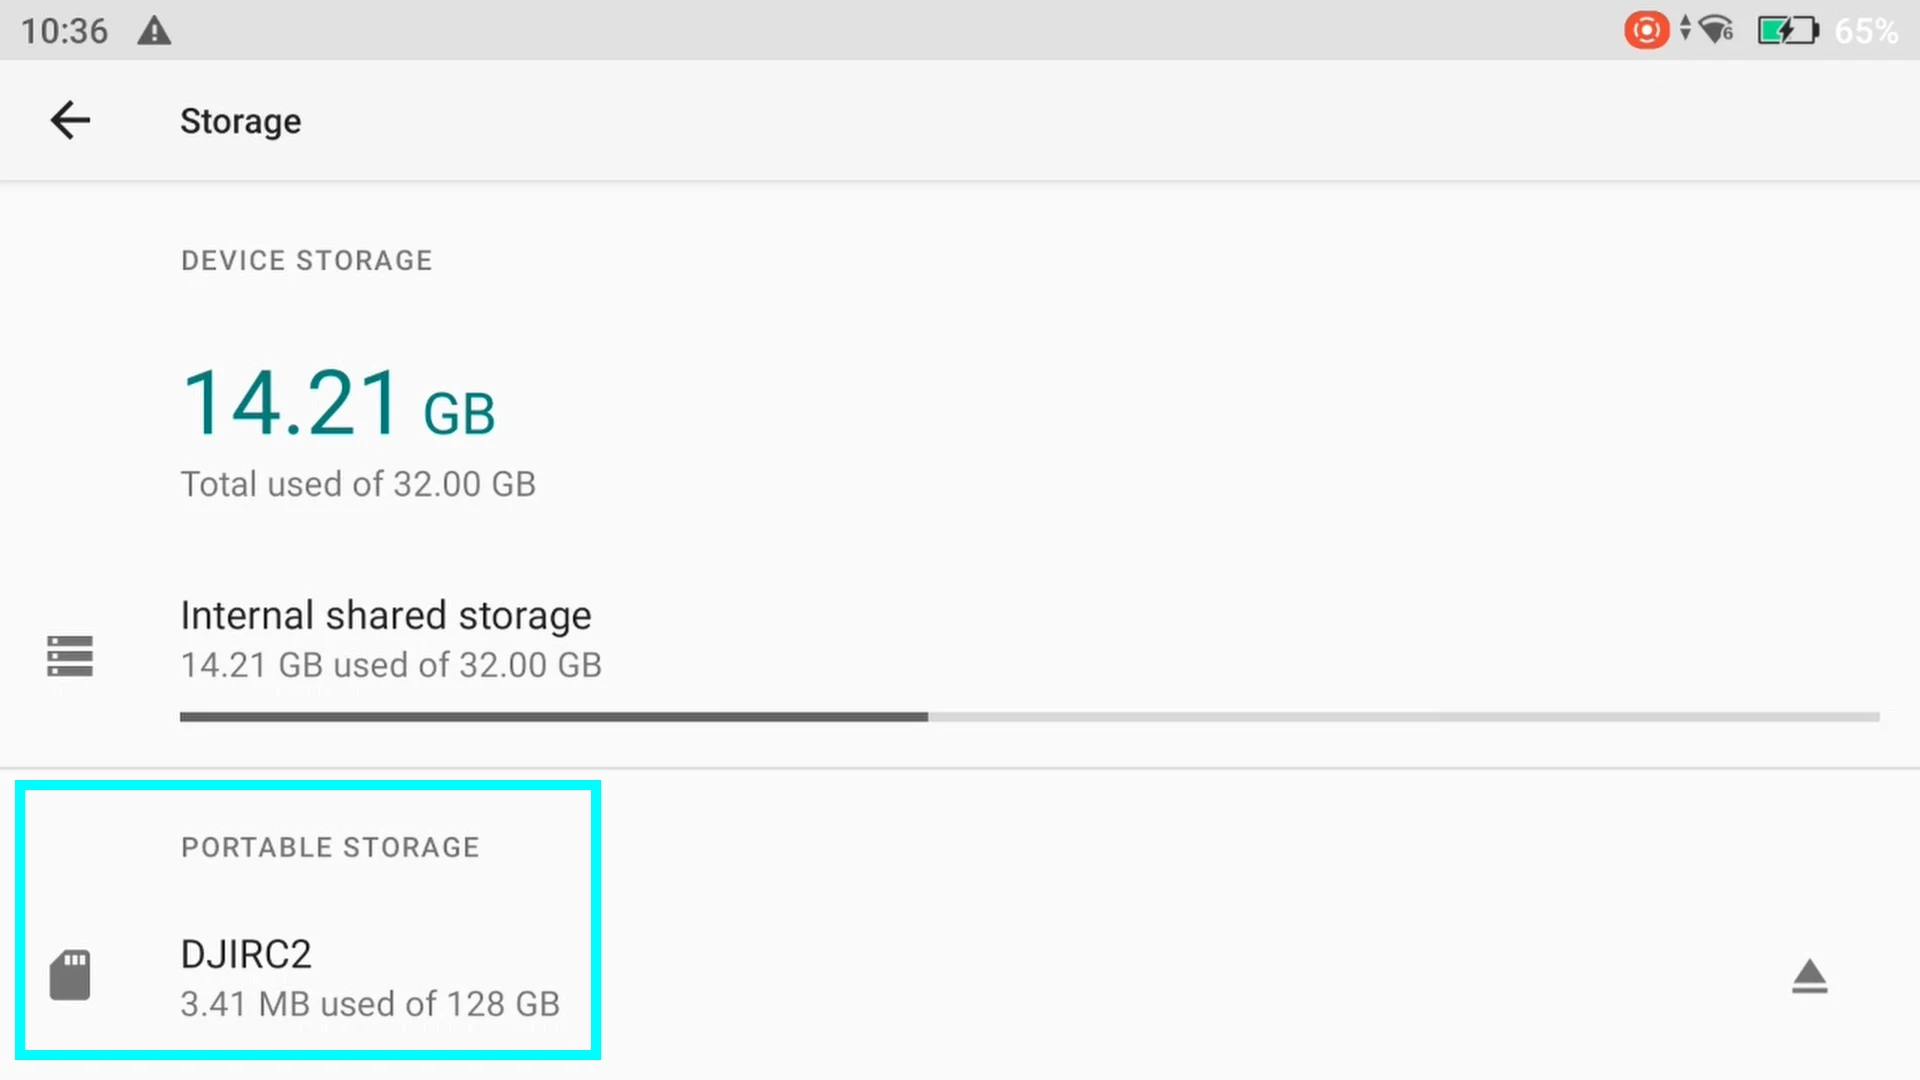
Faucet in your SD card’s title. You’ll see your SD playing cards used house.
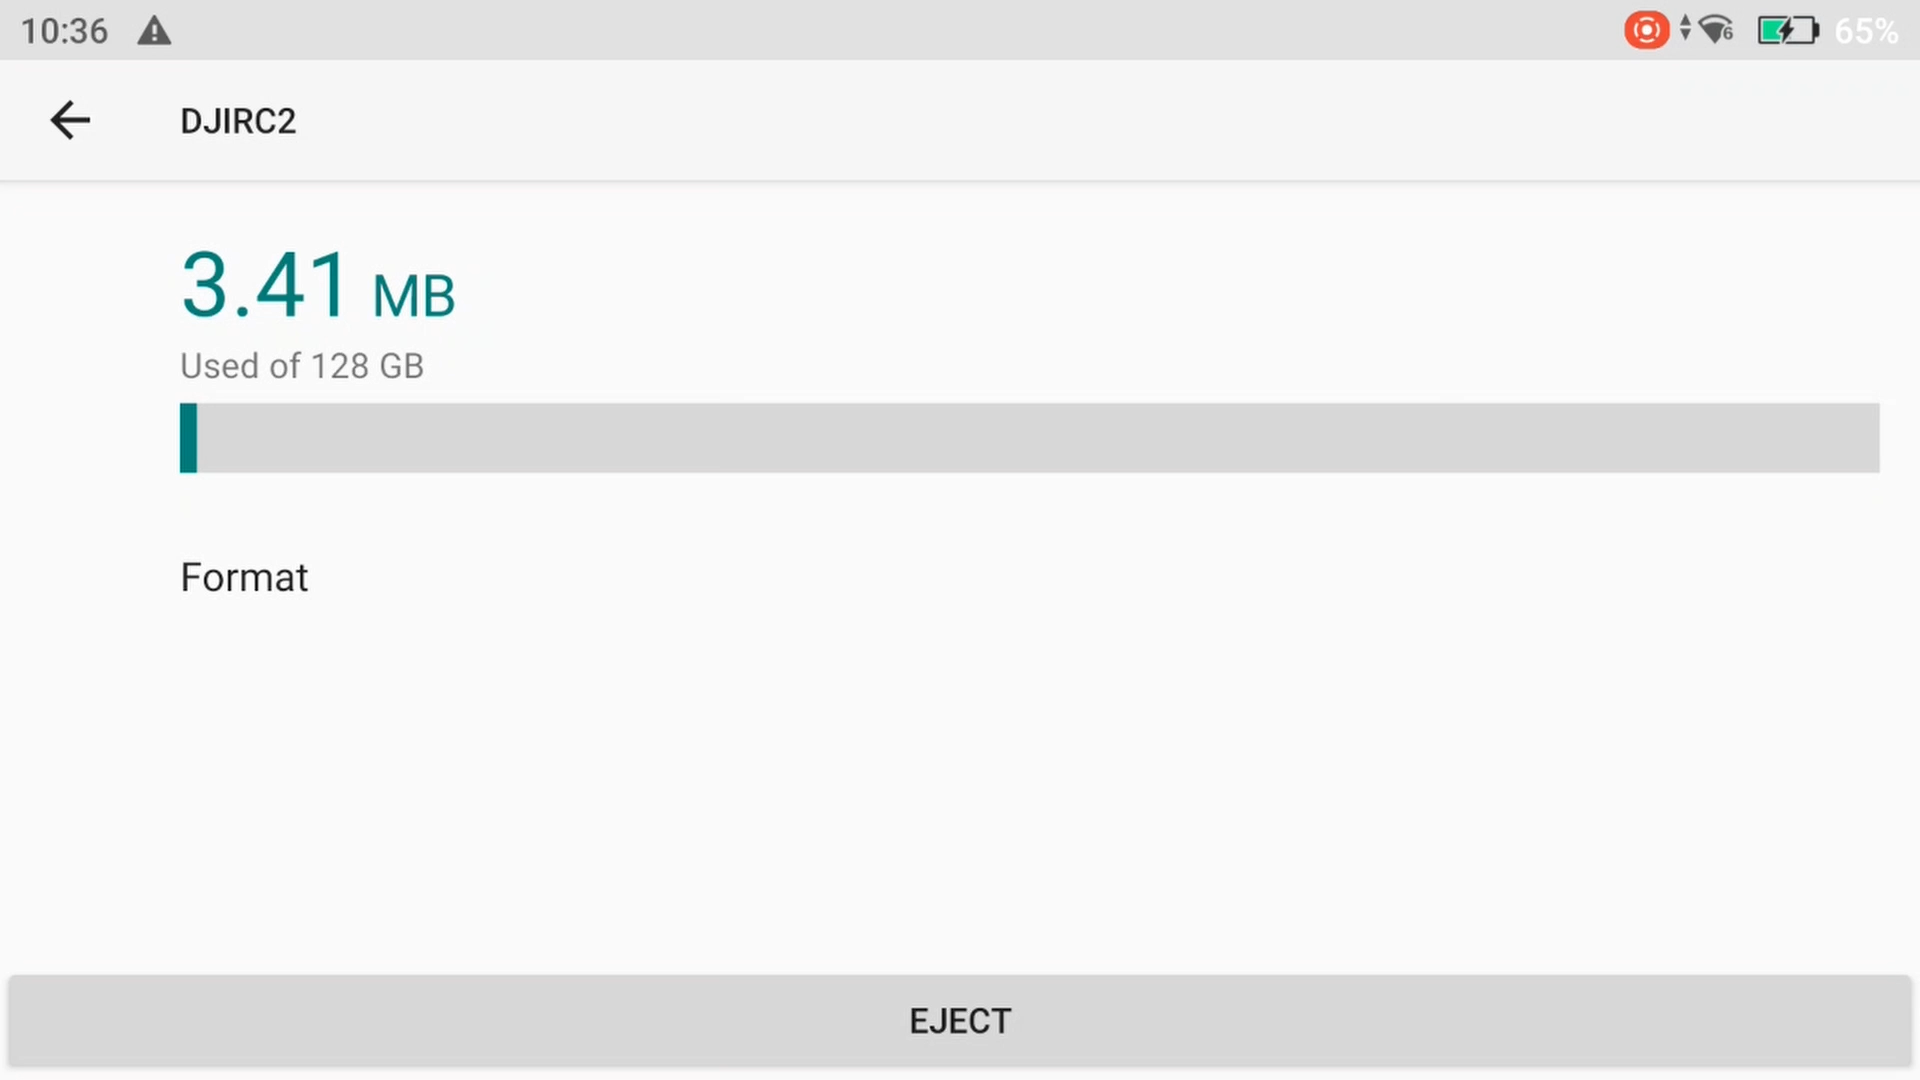
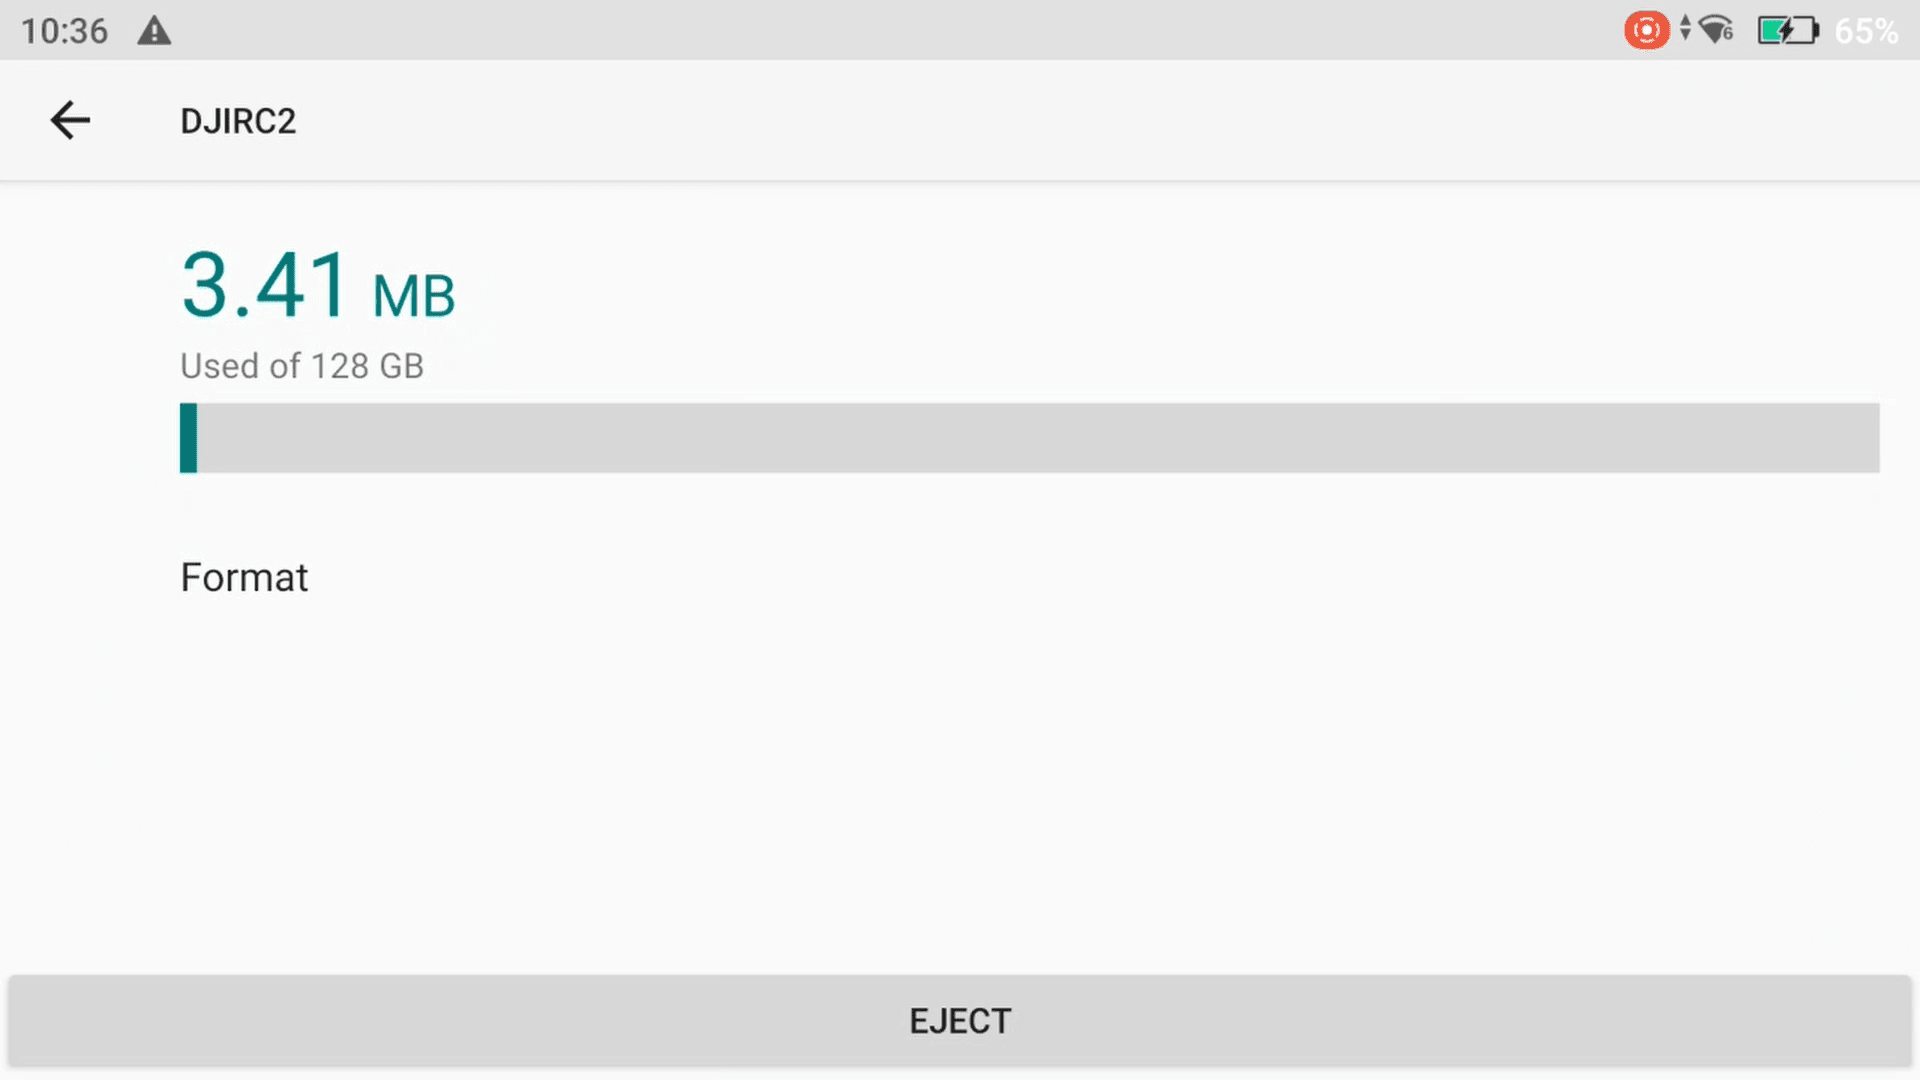
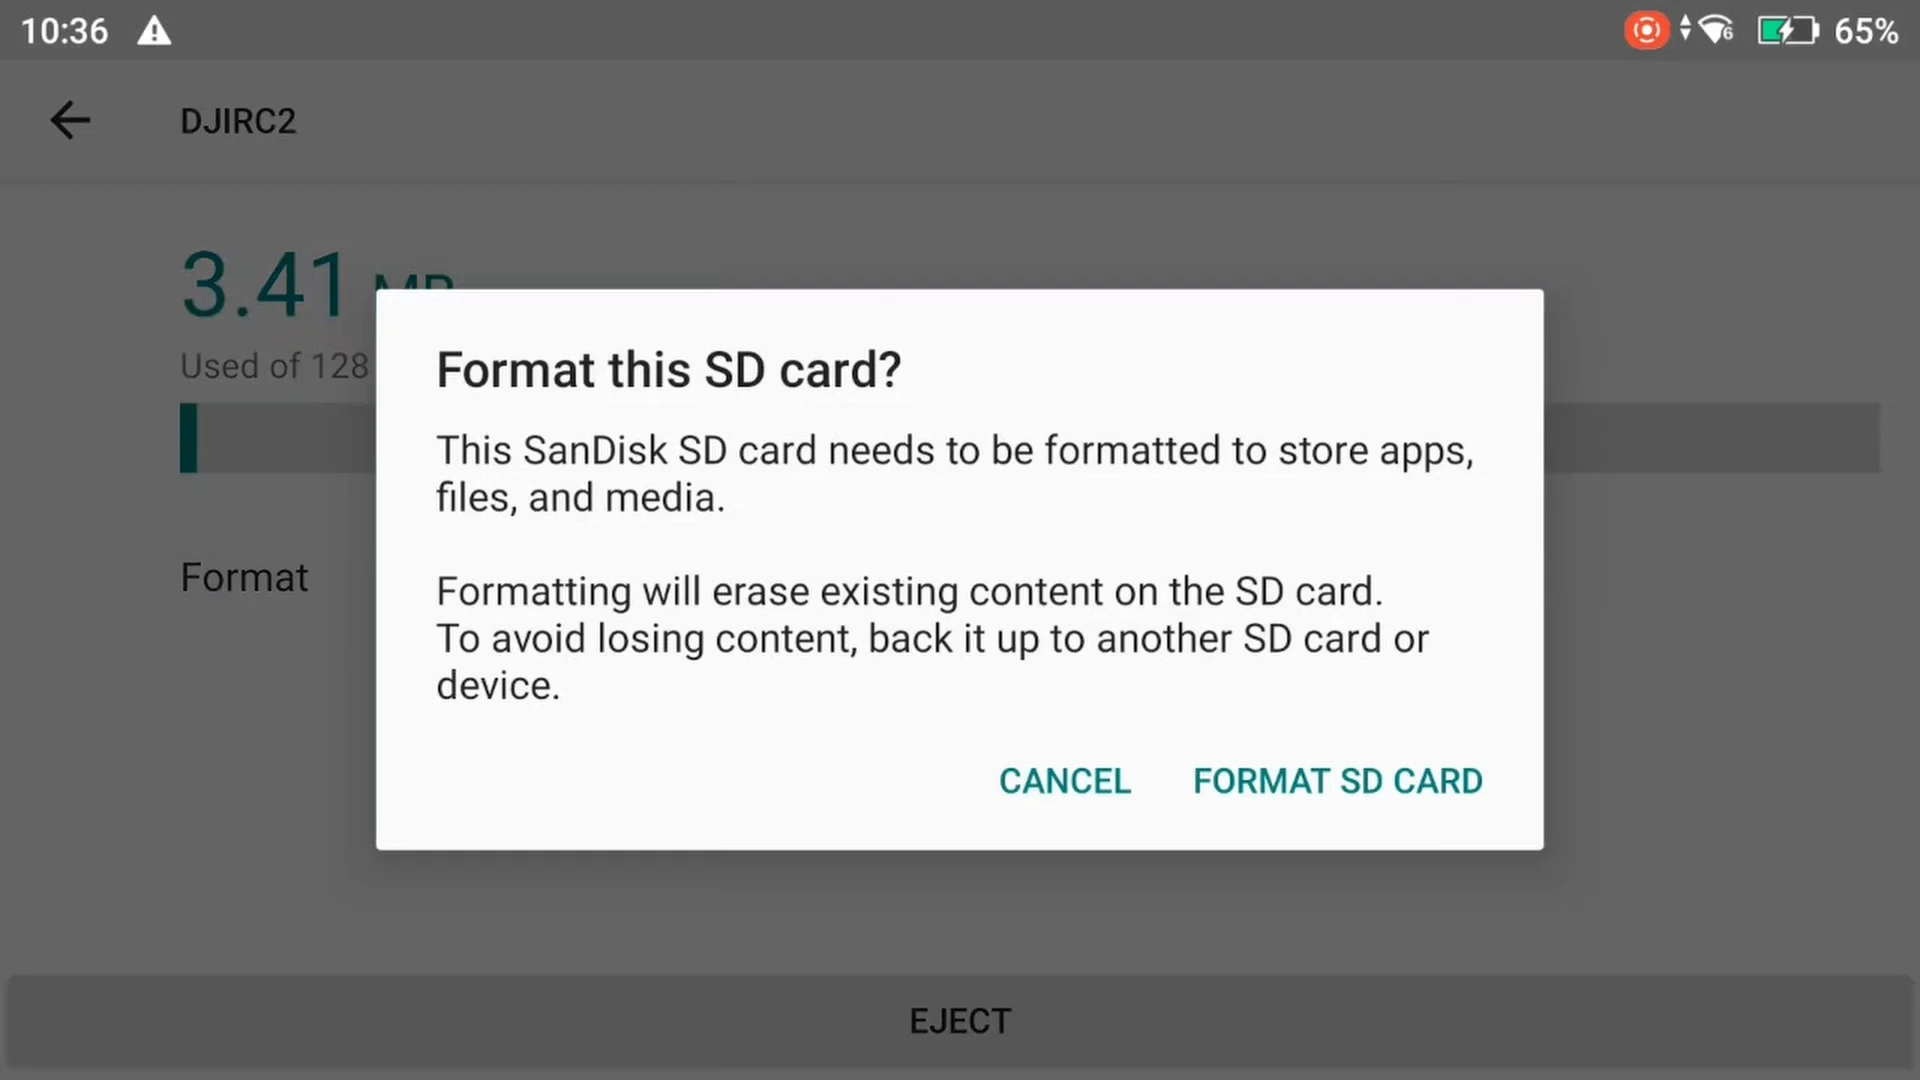
STEP 5: Press Format. You’ll then be requested to format the SD card. In case you select to format at the moment, press FORMAT SD CARD or in any other case select CANCEL

Ejecting the Micro-SD Card
Ejecting the SD card from both the Air 3 or DJI RC 2 is dealt with the identical.
Warning should be exercised when eradicating both SD card, as a finger slip may cause the SD card to force-eject randomly.
To eject both the Air 3 or DJI RC 2 SD card:
STEP 1: Utilizing a thumbnail, at a slight angle, push the SD card in after which slowly take away your thumb.
STEP 2: Rigorously pull the SD card out.
Tip: When you’ve got bigger fingers, or discover it troublesome to take away the SD card, merely connect a bit of scotch tape to the top of the SD card, successfully making a tab to tug the SD card out.